Table of Contents
1. Location #
- Plugin index page/dashboard is set here
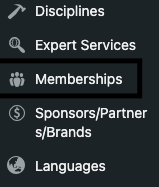
- In the sidebar it is located here:
2. How to Create Membership Levels
- Go to Memberships > Membership Levels in the WordPress dashboard.
- Click Add New Level.
- Fill in the following fields:
- Level Name: Name the level (e.g., Bronze, Silver, Gold).
- Description: Add a description for what this level includes. This appears on the membership sign-up page.
- Billing Details:
- Set the initial payment (e.g., $10).
- If it’s a recurring subscription, enable Recurring Subscription and configure the billing frequency (e.g., $10 every month).
- Optionally, set a trial period (e.g., free for the first month).
- Expiration Settings: If the membership expires, set the expiration period.
- Save the level by clicking Save Level.
3. How to Change Membership Level Descriptions and Prices #
- Go to Memberships > Membership Levels.
- Find the membership level you want to edit and click Edit under the level name.
- Update the Description, Initial Payment, or Recurring Subscription details.
- Save your changes.
4. How to Set Up Stripe for Payments #
- Go to Memberships > Settings > Payment Gateway & SSL.
- In the Payment Gateway dropdown, select Stripe.
- Follow these steps to connect Stripe:
- Create a Stripe account if you don’t already have one.
- In Stripe, go to the API keys section (under Developers).
- Copy the Publishable Key and Secret Key.
- Paste these keys into the respective fields in PMPro.
- Enable SSL for your site to ensure secure payments:
- Use an SSL certificate (your hosting provider can help set this up).
- Save the settings.
On staging I always prefer to use sandbox/testing mode.
5. How to Create Discount Codes #
- Go to Memberships > Discount Codes.
- Click Add New Discount Code.
- Fill out the form:
- Discount Code: Enter the code name (e.g., SAVE20).
- Discount Amount:
- Set either a percentage discount (e.g., 20%) or a flat amount (e.g., $10).
- Start and End Dates: Set the validity period for the discount code.
- Applicable Levels: Choose which membership levels the code applies to.
- Save the discount code.
6. Test the Membership System (example is done on staging) #
- Make sure you are logged out.
- Test out with random email address generated at some third party service like TEMPMAIL
- Go to JOIN (membership levels page)
- Pick a certain level and this values should be saved in a cookie:
- pmpro_visit – 1
- membership-type – {choosen level}
- You will be redirected to the register page and enter register info there.
- You can do registration by completing the form or simply by clicking the GOOGLE sign and do the register part taken care of by google.
- After completing, you should get to the activate your email notice page, go check your email and open the link that automated email has sent you.
- Clicking that activate link should redirect you to the loading page and after 2-3 seconds to the SIGN IN page
- After sign in you will be redirected and forced to checkout page as long as you don’t complete it.
- Going to profile page or anything related to your profile will be blocked and redirected to the checkout page as long as you don’t complete it.
- Completing the checkout will get you the bill and entered into the stripe database.
- You can either run checkout process by test card or real card.
- If any errors occur or incomplete payments, every trace will be logged in the stripe dashboard (by stripe dashboard I mean the third party service, not in the WP CMS).
- You should be ready to fully use the platform!
7. Customizing Membership Emails #
- Go to Memberships > Settings > Email Settings.
- Edit the following:
- From Email Address: Set the sender’s email.
- Email Templates: Customize emails for events like membership confirmation, renewal reminders, etc.
- You can also install the Email Templates Add-On to enhance this further.
8. Tips for Managing Members #
- View members in Memberships > Members List.
- Search for members by name, email, or level.
- To manually change a member’s level:
- Hover over user in the members list and click EDIT MEMBER
- Go to memberships tab
- Change membership
- You will probably get some warning, but that is just PMPRO membership warning bug which doesn’t prevent you from changing the level
- In the EDIT MEMBER tab you will also have full logs of every interaction of a user to the membership like orders log.


